Mounting evacuated tube collectors on the ground requires some techniques not used for the traditional roof mounted application. Below are some photos illustrating, literally from the ground up, the steps involved.
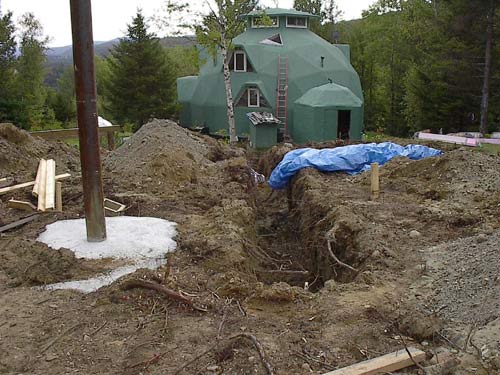
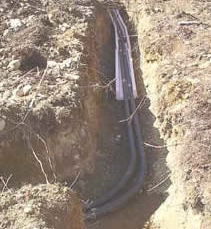
Solar water heating installation trench
Even though 90% of all solar hot water systems use anti-freeze between the collectors and the solar heat exchanger (see schematic), the supply and return lines should still be below the frost line. Freezing is not the issue, but ground movement may be. Long runs are particularly susceptible to seasonal heaving of the soil.
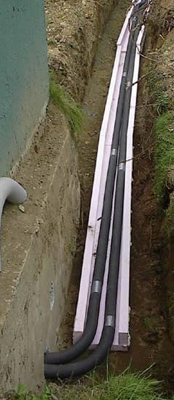
Insulated line
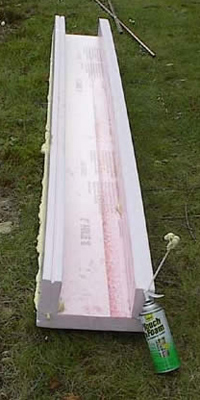
Insulated box
There are many ways to insulate your solar supply and return lines, most are very expensive and offer low R-Values. The simple method shown above is nothing more than 2″ extruded polystyrene foam ripped into strips (12″ wide top/bottom, 4″ wide for the sides). These strips are fashioned into a box with spray foam.
Although it’s tempting to use a roll of PEX (to avoid having connections underground), the supply and return lines should always be copper. This is because summer temperatures generated by the system can easily melt any type of plastic tubing. Of course, soft, annealed copper can also be used if you want a system with no underground solder connections, but 3/4″ soft copper is about $ 3.50/ft. so you’ll want to factor the cost into your decision.
The same high temp considerations should also be given to the type of foam used to sheath the copper pipe. The common hardware store pipe insulation used for domestic water lines would melt away after the first year, so use either Armaflex or Insul-tube. Either of these products give you an initial R-5 insulation value, then, once enclosed within the XPS box, the total R-value jumps to R-15.
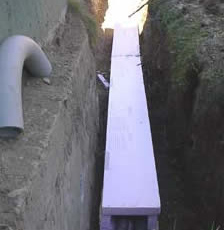
Once the insulated copper lines are installed within the foam box, the top cap is foamed on and the joints between the 8 ft. sections are also sealed with spray foam. Although not shown here, a custom bend, also made out of XPS foam, was fashioned to completely encase the lines.
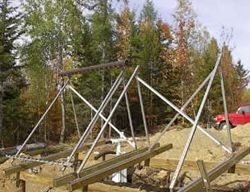
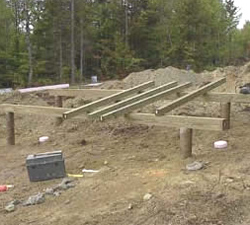
Depending upon the snowfall in your area (or lack thereof), the mounting assembly will either be raised a foot or two off the ground or flush mounted at ground level. Notice that the rear crossbar in this installation is raised a foot higher than the front. This enhanced forward tilt helps compensate for the low winter sun at Vermont’s high latitude.
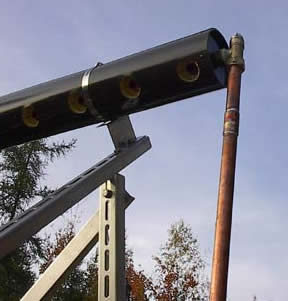
Seido 5 Evacuated tube header
The fittings on the Seido-5 are metric, but a short stub of copper with a few thousandths of an inch milled off one end is included with the assembly kit to make the transition to our standard 3/4″ copper effortless.
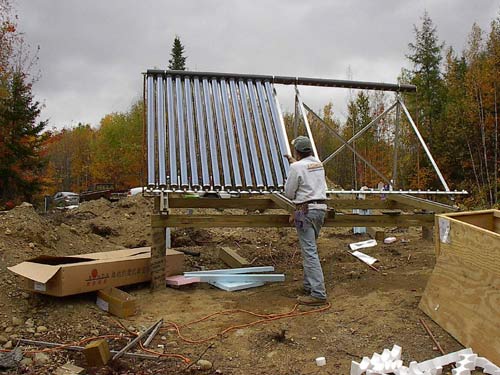
Evacuated tube installation
Installing the evacuated tubes into the header assembly should be the absolute last phase of the project. This means that ALL the plumbing, (i.e. solar heat exchanger to and from the collector, heat exchanger to solar storage tank, all connections tightened, etc.) should be completed and pressure tested. This is important because the tubes sitting in full sun without the benefit of a storage tank for heat absorption will generate extremely high temperatures.
In addition, there is a 3″ long bulb at the top of every evacuated tube. This is the condenser. A tube sitting in the full sun can get hot enough to raise the temperature of this condenser bulb to 390 degrees! If the tubes are laying around in the sun, the possibility exists for severe burns, so be very careful. Also, if the tubes are installed into the top header but have no storage tank to transfer heat into, the “dead” collector loop gets hotter and hotter, the thermal expansion raises the pressure higher and higher, and well….you get the idea.
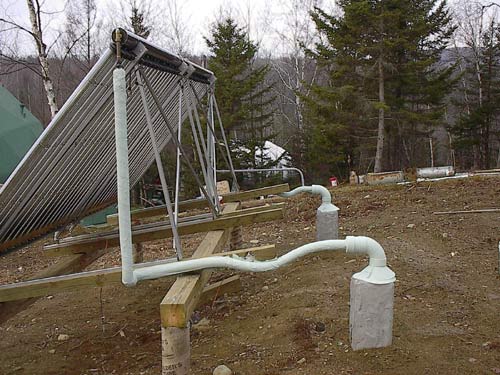
Flexible connectors on evacuated tube arrays
This photo illustrates an important consideration for ground mounted solar in frigid locations, namely, frost heave. Even though the collectors are mounted on insulated concrete piers (using the frost protected, shallow foundation method), the possibility still exists for motion between the array and the vertical insulated columns leading to the buried piping.
To solve this problem, the 3 ft. long flexible stainless connectors supplied with the evacuated tube kit become the transition between the array and the columns (notice the sag in the piping). These flexible tubes absorb any seasonal movement between the array mounting structure and the underground plumbing. Rigid copper is not so forgiving.
Also, although the vertical columns appear to be cast cement, they are actually made of 2″ XPS foam (blueboard) that has been coated with a thin layer of stucco for weatherproofing. A 4″ PVC pipe runs down the middle of the column and the insulated copper pipe runs down the middle of the PVC. Fiberglass insulation was stuffed into any gaps between the PVC and the XPS column. In short, any available opportunity for adding insulation should be utilized.
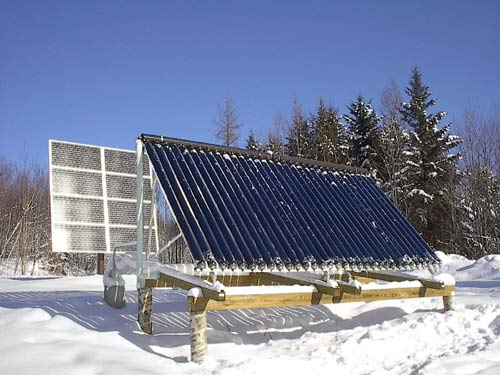
Evacuated Tubes work great even in the winter
The final issue becomes protecting any exposed foam insulation from the elements, particularly damaging UV light. Painting with a quality exterior latex is often recommended, but if you’d like to go a step further, try wrapping the foam with a flexible polyester cloth, then painting the cloth with two coats of elastomeric paint. Birds have been known to “borrow” pieces of exposed foam for nesting purposes (can’t blame them for wanting to insulate their homes, I suppose). Fortunately, the painted cloth forms a semi-rigid shell over the foam and protects the insulation from both damaging rays and warmth seeking wildlife.
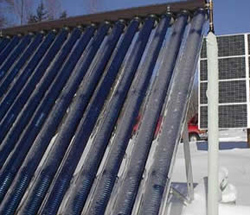
Frosty tubes
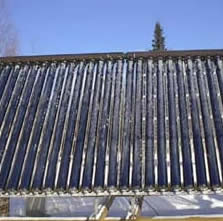
Frosty winter evacuated tube array
Even with a layer of frost coating the tubes, 150 degree anti-freeze circulated to the solar heat exchanger. The outside temperature peaked at 5 degrees F on this cloudless, mid-December day.